How to Install Auto Wrap Vinyl Like a Pro?
Installing Auto Wrap Vinyl well is less about speed and more about control. The finish depends on what happens before the film touches the vehicle: careful washing, removal of wax and residue, and a dry, dust-free surface. Even a tiny grain near a door handle can become a visible bump. Small details matter.
Wrap trainer Justin Pate’s advice, paraphrased, is simple: “Prepare the surface carefully, and never force the film.” That principle guides every stage of a professional installation. Measure each panel, plan where seams will sit, and keep the vinyl supported as you work. A squeegee should move steadily from the center toward the edges, pushing air out without stretching the material unnecessarily. Gentle, even heat helps the film conform around curves. Too much heat can distort it. Too little can leave tension that causes lifting later.
Take your time. Corners and recessed areas need particular attention because film can pull back there after installation. Repositioning is sometimes necessary; pretending every pass is perfect is not useful. Check the surface under clear, angled light, then inspect edges and seams before calling the job finished. The exact approach varies by film and vehicle, so follow the manufacturer’s instructions and practice on manageable sections. A clean workspace helps, but it cannot replace patience or experience. That is the craft: measured hands, good preparation, and an honest final inspection.
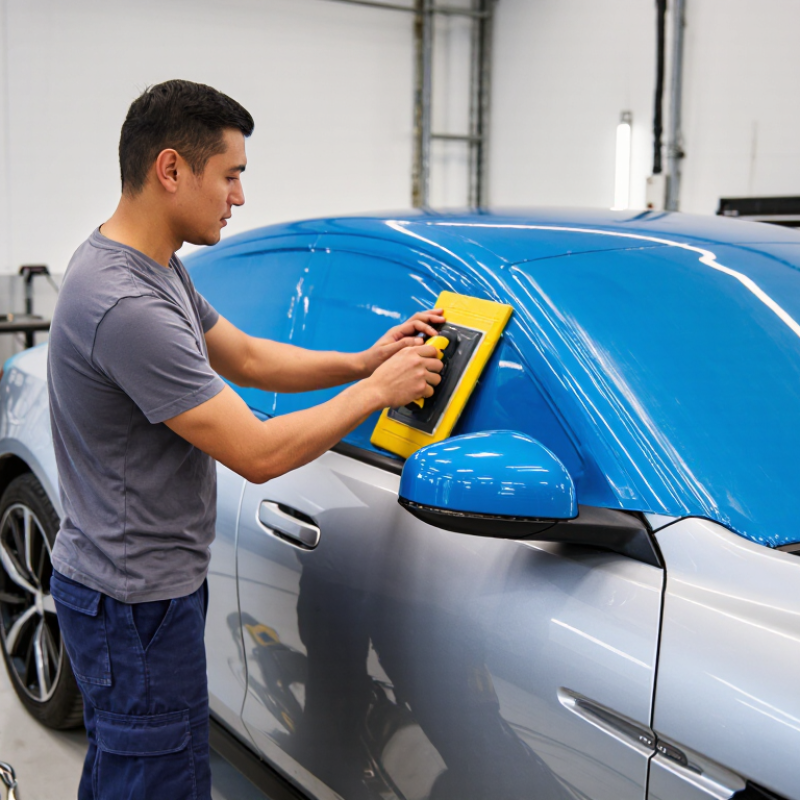
Prepare the Vehicle, Workspace, and Installation Tools
A clean installation begins before the vinyl leaves its liner. Wash the vehicle, then remove wax, road film, and residue from panel edges and recesses. Dry seams with clean air and inspect the surface under bright, angled light; tiny fibers can show through the finished film. Work indoors when possible, away from open doors, fans, and sanding dust. Keep the space evenly lit and comfortably warm, and check the film supplier’s temperature range with an infrared thermometer. Conditions vary by material. Don’t guess.
Set out a felt-edged squeegee, magnets, lint-free cloths, masking tape, a sharp knife, and a heat gun before positioning the film. Keep spare blades nearby, but cut cautiously around paint and trim. A 2024 Grand View Research report estimated the global automotive wrap films market at 4.76 billion U.S. dollars in 2023, underscoring the scale of this work. Market growth cannot replace careful preparation. Even a tidy bay may hide dust near a mirror or handle; pause and inspect again. Small details matter. My own checklist would still miss something now and then, so a final surface check is worth the extra minute.
Measure Panels and Plan the Vinyl Layout
Good vinyl installation starts with a panel map, not a knife. Wash and dry the vehicle, then measure each panel at its widest points. Record height, width, and the extra material needed to reach behind edges. A flexible tape follows curves better than a rigid ruler. Check measurements twice. Door handles, mirrors, and deep body lines can change the usable area. Don’t assume matching panels are identical; even small differences matter. Mark each section on paper, including seams and trim that may need removal.
Plan the layout with the vinyl’s grain and visible edges in mind. Keep the pattern running consistently across adjacent doors, and place seams where they are less exposed to view and road spray. Add a practical margin around each piece, especially near curved corners. Too little material makes positioning stressful; too much can create awkward folds. Use masking tape to mock up panel boundaries before cutting. Step back and inspect the alignment from several angles. A neat paper plan can still miss a tight curve, so treat it as a guide, not a guarantee. Some measurements will need adjustment during a dry fit. That’s normal.
How to Install Auto Wrap Vinyl Like a Pro? - Measure Panels and Plan the Vinyl Layout
Example planning measurements for a generic midsize sedan. Measure each vehicle panel before cutting; actual dimensions and contours vary.
| Panel | Qty. | Approx. Surface Size
(W × L, mm) | Cut Size Including Allowance
(W × L, mm) | Suggested Layout on 1,524 mm Roll | Approx. Roll Length Used |
| Hood | 1 | 1,450 × 1,200 | 1,350 × 1,600 | Rotate so the 1,350 mm edge fits across the roll; keep the film grain aligned with the vehicle’s front-to-back direction. | 1.60 m |
| Roof | 1 | 1,400 × 1,200 | 1,350 × 1,550 | Rotate to fit the roll width and align the film consistently with the hood where practical. | 1.55 m |
| Trunk lid | 1 | 1,300 × 1,050 | 1,450 × 1,200 | Cut with the longer edge across the roll; check the design direction before cutting patterned film. | 1.20 m |
| Front and rear doors | 4 | 1,100 × 800 each | 1,250 × 950 each | Place one cut piece across the roll per run. Keep the film direction consistent on both sides of the vehicle. | 3.80 m total |
| Front fenders | 2 | 750 × 650 each | 900 × 800 each | Cut as separate pieces; use offcuts for small trim pieces only after confirming the grain direction. | 1.60 m total |
| Rear quarter panels | 2 | 1,250 × 850 each | 1,400 × 1,000 each | Use separate runs so each panel has room for trimming and conforms without a forced seam. | 2.00 m total |
| Estimated length for listed panels, before contingency | 11.75 m |
| Practical planning allowance, including about 10% extra | About 13 m |
Measurement method: measure the widest and longest usable surface areas, then add roughly 75 mm (3 in) around each edge for handling, trimming, and tucking. The allowance and material estimate are planning guides, not substitutes for test-fitting film on the actual vehicle. Bumpers, mirrors, and other unlisted parts require additional material.
Position and Apply the Wrap Without Trapping Air
Start with a clean, fully dry panel and work in a sheltered space with steady temperature. Dust, moisture, and wind can all interfere with adhesion. Measure the vinyl, then hold it over the panel before removing its backing. Check that seams, handles, and edges line up as planned. Slow down. A few minutes of positioning can prevent a crooked finish.
Use masking tape to create a hinge along one edge. Peel back a small section of the liner, keeping the rest supported so the vinyl does not fold onto itself. Lay the film down gently, then sweep a squeegee from the center toward the nearest edge. Use overlapping strokes and light, even pressure. Keep the tool at a shallow angle. Don’t pull hard to erase a crease; excess tension can distort the pattern or cause the vinyl to lift later. I still find that rushing the first few inches creates more work than careful repositioning. It happens.
For curves, apply the film in small sections and warm it only within the material maker’s recommended range. Let it relax before pressing it into a recess. If an air pocket appears, lift the vinyl back toward that area and smooth it outward. Check again under angled light. Tiny bubbles can be easy to miss until the surface cools, so inspect edges and shallow dips before trimming.
Heat, Stretch, and Trim the Vinyl Around Curves
On a curved bumper, patience matters more than force. Clean and dry the panel, then warm the vinyl gradually with a heat gun in motion. It should feel pliable, not hot or glossy. Anchor the center first. Work outward with a squeegee, keeping the film smooth and your hands relaxed. Small movements help.
For a tight recess, gently stretch the film across the curve rather than pulling hard from one edge. Too much tension can cause fingers, wrinkles, or a corner that lifts later. Warm the film again if it resists. Make relief cuts only where needed, keeping the blade away from the paint. Leave a small margin for trimming. Not every curve behaves neatly; that’s normal.
ASTM D3330/D3330M-04(2020) describes a controlled 180-degree peel test for comparing pressure-sensitive adhesive strength. It does not predict how a stretched corner will hold, so follow the film’s own installation and post-heating specifications. After trimming, check edges under bright light and press them down with steady strokes. I still inspect tricky corners twice; a rushed edge can look fine, then lift overnight.
How to Install Auto Wrap Vinyl Like a Pro
Heat, stretch, and trim the vinyl around curves with controlled temperature.
Typical published guidance for cast automotive wrap films places application temperatures around 16–32°C (61–90°F), with post-heating near 90°C (194°F) in areas that have been stretched or formed. Warm the vinyl gradually, use only enough stretch to follow the curve, and trim carefully. Temperature limits vary by film, so follow its technical data sheet and verify surface temperature with a thermometer.
Post-Heat the Film and Inspect the Finished Wrap
Post-heating helps the wrap settle around curves and reduces the chance of edges lifting later. Follow the film maker’s temperature guidance; different materials need different settings. Use an infrared thermometer rather than judging heat by touch. Keep the heat moving, especially near plastic trim, seals, and painted edges. Too much heat can distort the film or damage the surface.
Warm each stretched area evenly, then press it down with a clean gloved hand or soft squeegee. Pay close attention to deep recesses, panel edges, and seams where tension can remain hidden. Let the film cool before checking whether it stays in place. I have learned that rushing this pause can make a neat-looking edge lift the next day. Not ideal.
Inspect the vehicle under bright, angled light. Look for trapped dust, small bubbles, wrinkles, and exposed edges. Check around handles, mirrors, and corners from more than one viewing angle. If a bubble remains, do not puncture it blindly; assess its size and location, then use an appropriate correction method. Small details matter. Wipe away residue with a clean, compatible cloth, and avoid pulling on warm film during the final check. Document any areas that need attention before calling the job complete.